Managing the consent library
The first step to setting up your consents is to add them all to the consent library within the Kids Club HQ system.
To do this you'll need to sign into your dashboard and head to the Administration view and then to the Organisation Settings view in the sidebar. Once in this view, you'll need to view the Consents tab, and then the Consents Library tab as shown in the screenshot below.
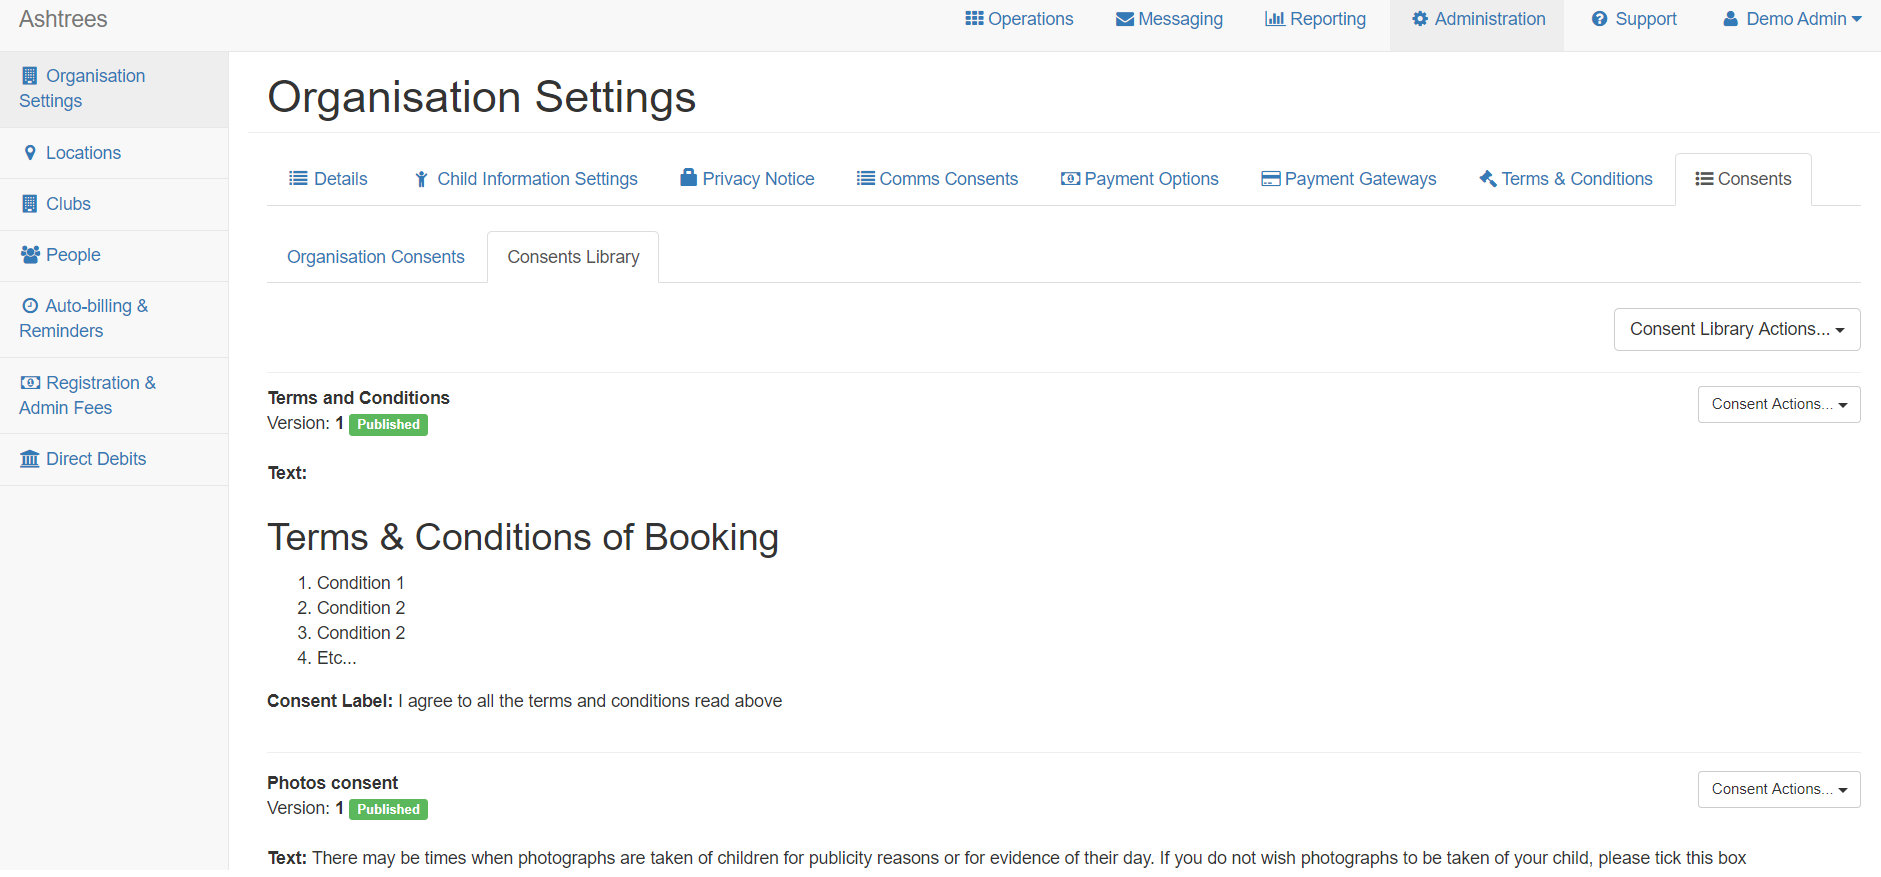
In here, you'll need to add all the consents required for your organisation and once they've all been added you can view them all in here (you can also delete any that are no longer needed and create new versions of older consents). To begin adding the consents, click the Consent Library Actions button and you'll see options to -
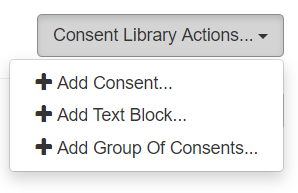
Add Consent
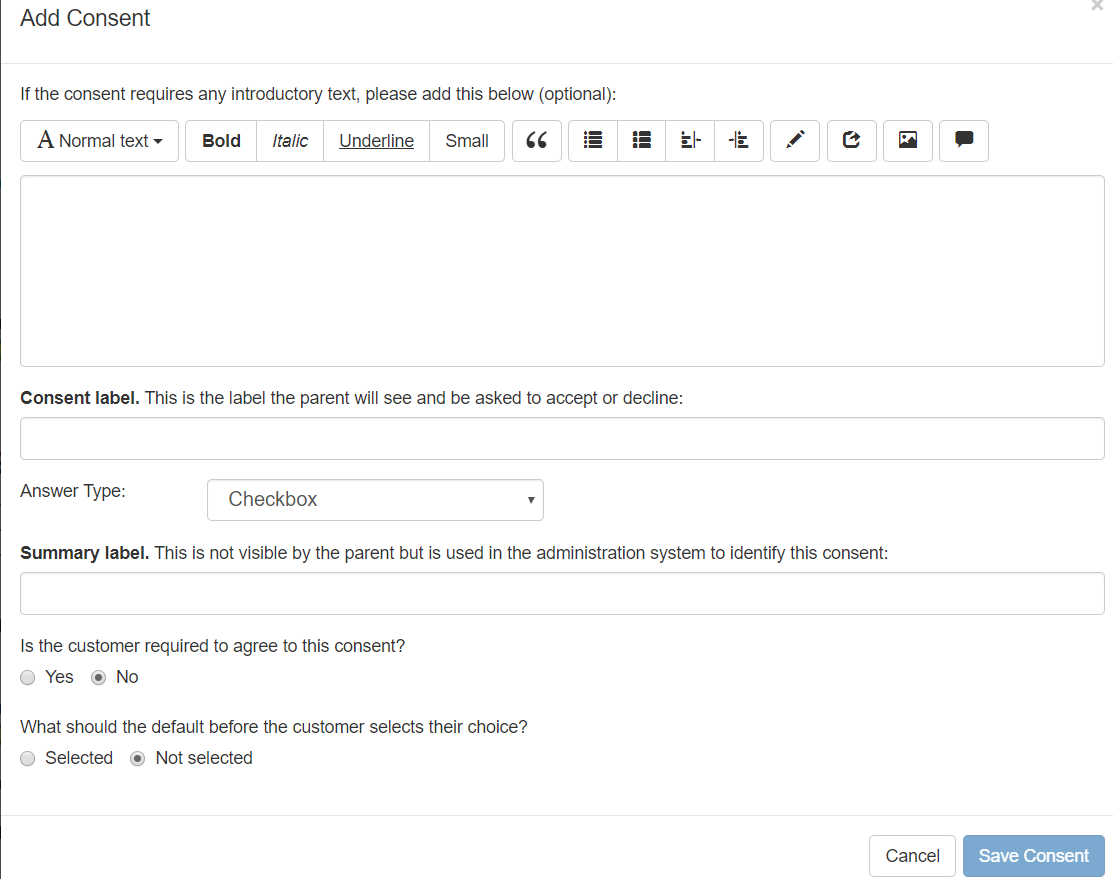
To add a consent, for example "I agree to photos of my child being taken/used on the website", click this option. A pop-up will appear prompting you to enter more details for the consent. You'll be prompted to enter introductory text for the consent if required, the the consent label/text the parent will see and be asked to accept or decline. You can amend the answer type from a checkbox to a yes/no option and can confirm whether the customer is required to agree to the consent and if the default should be "selected" or "not selected" before the customer selects their choice to the consent.
Add Group Of Consents
Selecting this option from the drop down box will create a consent group where you can group consents that are similar/need to be asked together. The group will be created and added to the bottom of the Consent Library list of consents. You'll see a Consent Group Actions button where you can add text blocks and consents to the group.

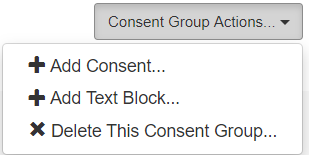
Clicking this button, you'll see options to Add Consent, Add Text Block and Delete This Consent Group. Once the group has been created, you can add the Text Box if needed, as described below to introduce a set of questions/consents. You can then add all the consents to the group.
Add Text Block
Text blocks are usually only used within a consent group to introduce a set of related questions. For example -
From time to time, we may take take photos of the children in the club. Please select from the options below whether we can use photographs of your child
- I agree to photos of my child being used in marketing material
- I agree to photos of my child being used on social media
- I agree to photos of my child being used on the club website

Check out our guide on how to apply these consents to your organisation/to the relevant clubs - https://kidsclubhq.freshdesk.com/support/solutions/articles/33000250320-managing-consents-sometimes-called-permissions-
Updating Consents:
There are some elements of a consent that, if changed, will need the parent to review and agree to the consent again. For example, if the question changes, it's no longer the same consent that the parent agreed to originally.
For these items, you need to create a new version of the consent item.
Some options of the consent are only used internally. For these, you don't need to create a new consent, you can just change these options.
Creating a new version of a consent:
First you'll need to head to your consents library within the system. To do this, you'll need to head to the 'Administration' tab and then to 'Organisations settings'. You'll then see a "Consents" tab, you'll need to click this and then select the 'Consents Library' tab. This will take you to view all the consents you've got within the system.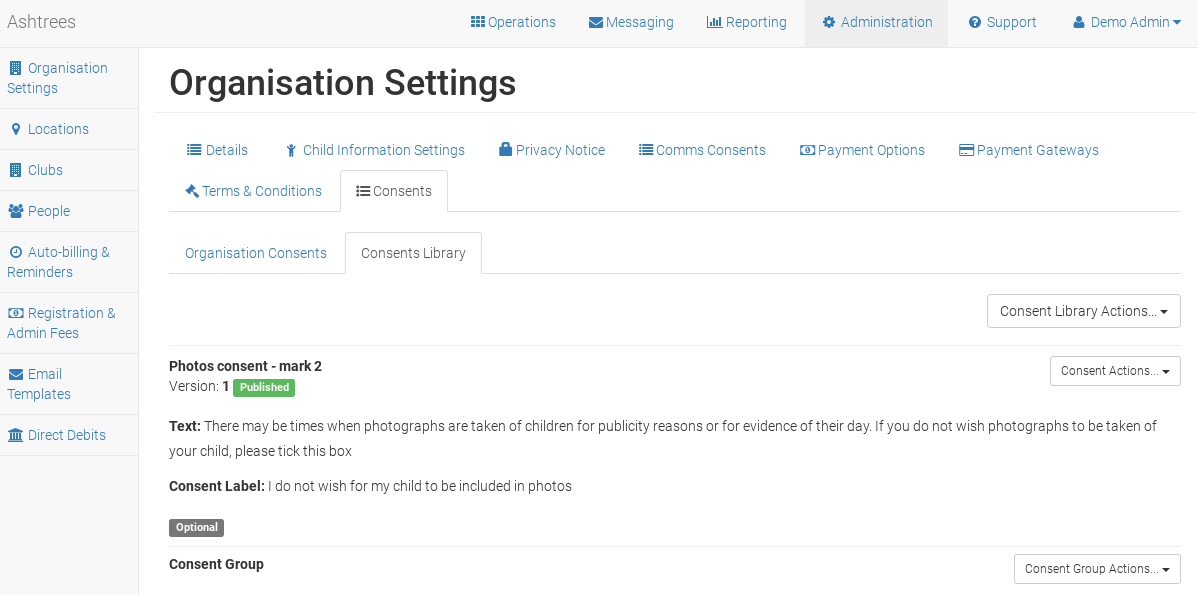
As you can see from the screenshot above, you'll then see a list of all the consents. You'll need to locate the consent which you need to create a new version for. Once located, select the 'Consents Action' drop down on the right.

A drop down will then appear and you should select the 'Create A New Version'. A pop-up will then appear asking you to confirm you'd like to create a new version of the consent.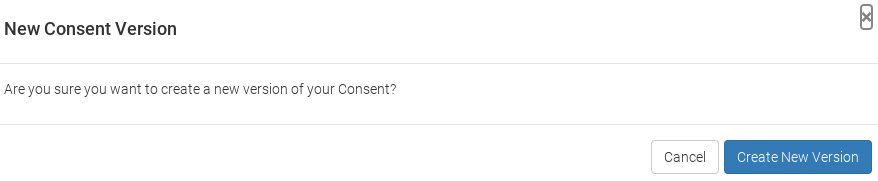
You should click the 'Create New Version' button. You'll then be taken back to the previous screen and will notice that a new version of the consent has been created but it's a draft consent. So, you'll now need to edit the consent. If you locate the consent and now select the 'Consent Actions' drop down, you'll see a different list of options.

This time you'll need to select 'Change Consent' and a pop-up will appear.

In this pop-up you'll be able to change the introductory text for the consent, change the consent label, the answer type and the summary label etc. Once you've made the necessary changes you'll need to select the 'Save Consent' button. You'll then be taken back to the consent library and should see a green notification along the top to confirm the consent was saved.
Once you've finished making the changes required, the consent item just needs publishing. Again, you'll need to select the 'Consent Actions' drop down button and a list will appear.
You should select the 'Publish Latest Version' and a pop-up will appear, prompting you to confirm this action. You'll need to select to 'Publish Consent' and the new version of the consent will now be published.
Changing the consent options:
If it's just the internal options that need changing for the consent, you can do this without having to create a new consent. To do this, again, you'll need to locate the consent which you'd like to edit from the consent library list. You should then select the 'Consent Actions' drop down button to the right and a list will appear.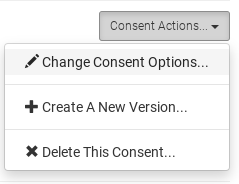
Here you should select to 'Change Consent Options...' and a pop-up will then appear.
You'll then be prompted to make the changes to the options for this consent, again these are options which are only used internally so do not need to be agreed again by the parents.
As you can see from the screenshot, you can change the summary label - parents do not see this, but this label is used in the system to identify this consent (on registers etc). You'll be able to select what the default should be for this consent before the customer agrees or disagrees and can then select to confirm if this is a consent that the customer is required to agree to.
Once you've made the necessary changes here, you'll need to select the 'Save Consent' button. You'll then be taken back to the consent library and should see a green notification bar along the top confirming that the consent options have been changed.